3 Essential Techniques for Safe Tree Trimming
Safe tree trimming protects both the person wielding the saw and the tree itself. When done incorrectly, trimming can lead to serious injuries from falling branches, unstable ladders, or contact with power lines. Poor cutting techniques also compromise tree health, leaving wounds that invite disease, decay, and structural weakness.
The difference between proper and improper trimming often determines whether a tree thrives or slowly deteriorates. Incorrect cuts can strip away the tree’s natural defences, creating entry points for pathogens and insects. Meanwhile, unsafe practices put trimmers at risk of falls, cuts, and other preventable accidents.
This guide covers 3 essential techniques for safe tree trimming that address both trimming safety and tree health:
- Understanding proper cutting location and the branch collar
- Mastering the 3-cut method for large branch removal
- Implementing crucial equipment and safety preparations
These fundamental approaches form the foundation of responsible tree maintenance, ensuring your trimming work enhances rather than harms the trees in your care.
What is the role of proper cutting location in ensuring tree health during trimming?
The cutting location determines whether a tree can successfully heal or suffer long-term damage. Making cuts at the correct position—specifically at the branch collar—is the difference between a tree that recovers quickly and one that develops decay, disease, or structural weakness.
Understanding the Branch Collar
The branch collar is the slightly swollen, raised area where a branch connects to the trunk or parent limb. This specialised tissue contains cells that actively produce chemical barriers and callus tissue to seal wounds. The collar acts as the tree’s natural defence system, creating a protective boundary that prevents pathogens from entering the main trunk.
Trees don’t heal wounds like animals do—they can’t regenerate damaged tissue. Instead, they compartmentalise injuries by forming barriers around the wound site. The branch collar is essential to this process, as it contains the highest concentration of cells capable of producing these protective barriers.
Why Cutting Into the Branch Collar Damages Trees
Cutting into or removing the branch collar destroys the tree’s primary defence mechanism. When this tissue is damaged, the tree loses its ability to effectively seal the wound, leaving it vulnerable to:
- Fungal infections that spread into the heartwood
- Bacterial diseases that cause internal rot
- Insect infestations attracted to exposed wood
- Structural decay that weakens the entire tree
Flush cuts—those made completely flat against the trunk—are particularly harmful because they remove the entire collar. These cuts create large wounds that the tree cannot properly compartmentalise, often leading to cavities and hollow sections within the trunk.
How Proper Cuts Promote Wound Compartmentalisation
Making cuts just outside the branch collar preserves the tree’s natural healing capacity. The collar tissue responds to proper cuts by rapidly producing callus tissue that gradually covers the exposed wood. This process, called tree wound healing, creates multiple chemical and physical barriers that:
- Block the spread of decay organisms into healthy tissue
- Redirect water and nutrient flow around the damaged area
- Maintain structural integrity of the trunk
- Minimise the wound’s overall impact on tree health
Correct cutting location accelerates recovery time significantly. Trees with properly positioned cuts typically begin.
How does the 3-cut method guarantee safety and effectiveness when removing large branches?
The 3-cut method prevents dangerous branch falls and protects tree bark from tearing during large branch removal. This safe trimming technique uses three strategic cuts to control how heavy limbs separate from the tree, eliminating the risk of unpredictable drops that could injure the trimmer or damage property below.
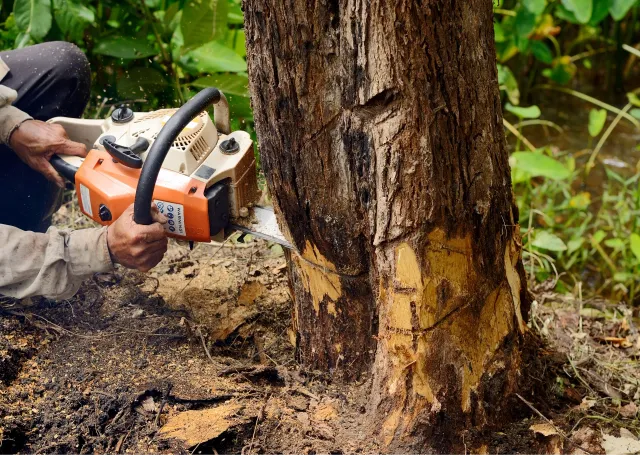
Step 1: The Undercut
Position yourself beneath the branch approximately 30-45 centimetres from the trunk. Make an upward cut from the bottom of the limb, sawing about one-quarter to one-third of the way through the branch diameter. This initial undercut creates a stopping point that prevents bark from peeling down the trunk when the branch eventually falls.
Step 2: The Relief Cut
Move 5-8 centimetres further out from your first cut, towards the branch tip. Cut downward from the top of the limb until the branch breaks away and falls. The weight of the branch will cause it to snap at this point, but the undercut you made prevents the bark from tearing beyond that first cut location. You’ll be left with a manageable stub still attached to the trunk.
Step 3: The Final Collar Cut
Identify the branch collar—that slightly swollen ring where the stub meets the trunk. Position your saw just outside this collar and make a clean, angled cut to remove the remaining stub. This placement allows the tree’s natural healing mechanisms to seal the wound without interference.
Why Each Cut Matters
The undercut serves as insurance against bark stripping, which can create wounds extending metres down the trunk. Without this protective cut, the weight of a falling branch tears bark and cambium tissue, leaving the tree vulnerable to disease and insect invasion.
The relief cut removes the bulk of the branch’s weight in a controlled manner. Attempting to remove a large branch in a single cut from the collar creates unpredictable breaking points. Heavy limbs can swing violently, strike the trimmer, or crash through structures below.
The final collar cut ensures proper wound closure. Leaving a stub prevents the tree from forming protective barrier zones, whilst cutting flush into the collar removes the specialised cells needed for compartmentalisation.
Safety Benefits for Trimmers
What equipment and preparations are crucial for ensuring safety while trimming trees?
Proper equipment forms the foundation of any safe tree trimming operation. The right tools protect both the trimmer and the tree from unnecessary damage or injury.
Essential Tools for Safe Tree Trimming
Quality equipment designed specifically for tree work makes all the difference when implementing the 3 essential techniques for safe tree trimming:
- Sturdy ladders with non-slip feet and proper weight ratings ensure stable positioning when reaching higher branches
- Pole saws extend your reach without compromising balance, eliminating the need for dangerous overreaching
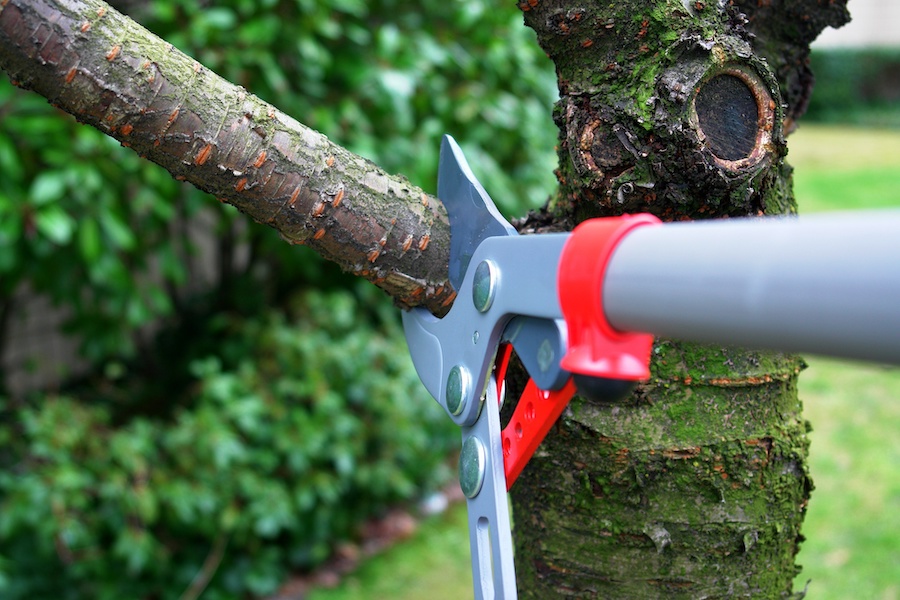
- Sharp pruning shears and saws create clean cuts that heal faster, reducing stress on the tree
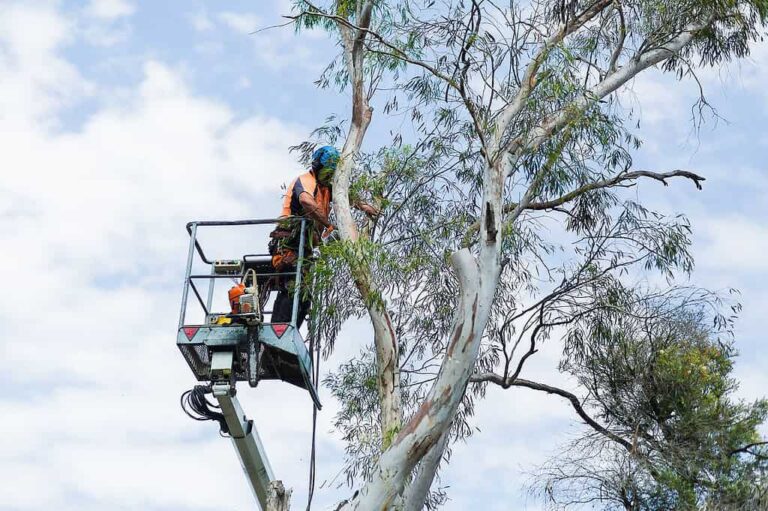
- Safety harnesses provide fall protection when working at significant heights
- Hard hats and safety glasses shield against falling debris during the cutting process
- Heavy-duty gloves protect hands from rough bark, sharp tools, and potential splinters
Using makeshift tools or household ladders not rated for tree work dramatically increases accident risk. Professional-grade equipment may cost more initially, but it provides the stability and precision required for safe, effective trimming.
Conducting a Thorough Risk Assessment
Risk assessment must occur before any cutting begins. A comprehensive evaluation identifies potential hazards that could turn routine trimming into a dangerous situation.
Scan the surrounding environment for these critical hazards:
- Overhead power lines pose electrocution risks, particularly when using metal pole saws or aluminium ladders
- Unstable branches weakened by disease, rot, or storm damage may break unexpectedly during trimming
- Weather conditions such as high winds or wet surfaces create slippery, unpredictable working conditions
- Tree lean or structural defects indicate potential failure points that could collapse during branch removal
- Underground utilities near the work area require marking before any debris cleanup or stump work
Professional arborists recommend maintaining a minimum 3-metre clearance from power lines. When lines run through or near the tree, contact your electricity provider rather than attempting the work yourself.
Work Area Safety and Planning
Work area safety requires establishing a clear perimeter around the tree before making the first cut. Falling branches follow unpredictable trajectories based on their size, weight, and angle of descent.
- Use caution tape or cones to mark off an exclusion zone where no one should enter during trimming operations.
- Communicate with everyone involved about this designated safe area to prevent accidental entry.
- If working near public spaces or roadways, consider additional safeguards such as spotters or traffic control measures to ensure passers-by remain out of harm’s way.
By implementing these precautions, you can minimise risks associated with falling debris and maintain a secure work environment throughout the entire tree trimming process.
Conclusion
Mastering these 3 Essential Techniques for Safe Tree Trimming transforms tree maintenance from a risky chore into a controlled, professional practice. The branch collar method, 3-cut technique, and proper equipment preparation work together to protect both personal safety and long-term tree care.
Each technique addresses a specific vulnerability in the trimming process:
- Respecting the branch collar ensures your trees heal properly and resist disease.
- The 3-cut method prevents dangerous bark tears and falling limbs.
- Thorough preparation with the right tools and risk assessment eliminates preventable accidents.
Safe tree trimming techniques require patience and attention to detail. Rushing through cuts or skipping safety checks puts you and your trees at risk. Take time to identify the branch collar before making any cut. Complete all three cuts in sequence when removing large limbs. Inspect your equipment and surroundings before climbing.
These methods aren’t just theoretical guidelines—they’re proven practices developed through decades of arboricultural experience. Professional tree surgeons rely on these exact techniques daily because they work. Homeowners who adopt these standards achieve the same level of safety and tree health that professionals deliver.
Your trees depend on proper trimming to maintain their structural integrity and vitality. You deserve to perform this work without injury. Commit to these three essential techniques, and every trimming session becomes an investment in both your wellbeing and your landscape’s future.
Learn more about 10 Must-Know Tips for Buying Quality Firewood This Winter